Launcher
The launcher is the main entry point of the GONet Wizard graphical user interface.
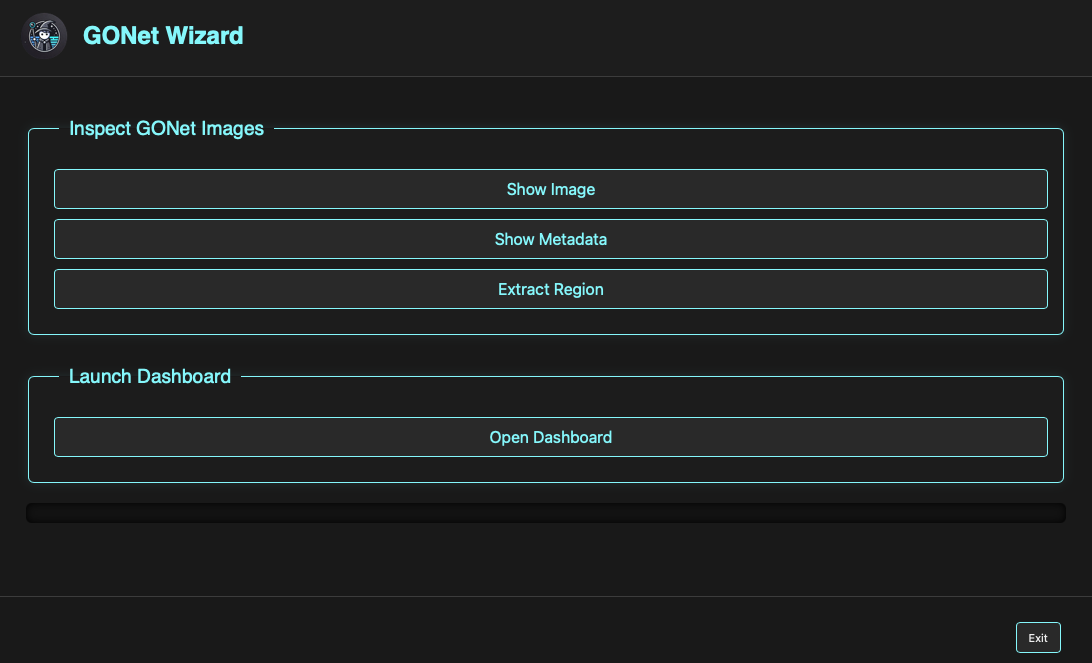
GONet Wizard launcher window.
Overview
The launcher provides access to the primary GONet Wizard tools:
Show Image
Show Metadata
Extract Region
Split RAW Images
Dashboard
Each button opens a dedicated form used to configure and launch the corresponding operation.
The launcher itself does not perform any processing. Instead, it serves as a central access point to the underlying GONet Wizard command system.
Note
The GUI is a frontend for the same processing engine used by the command-line interface.
Operations performed through the GUI produce the same results as their command-line counterparts.
To learn what each tool does, see:
Launcher Sections
Image Inspection Tools
The upper section of the launcher contains tools used to inspect and analyze GONet observations.
Show Image
Launches the image inspection tool, which allows users to visualize Bayer channels, compare observations, and explore image data interactively.
See Show Image GUI guide.
Show Metadata
Launches the metadata inspection tool, which displays image metadata, acquisition parameters, environmental information, and astronomical context.
Extract Region
Launches the extraction tool used to perform quantitative measurements within user-defined regions of interest.
See Extract GUI guide.
Split RAW Images
Launches the RAW splitting tool used to convert original GONet RAW .jpg
files into standard TIFF and JPEG products.
Dashboard
The lower section of the launcher provides access to the GONet Dashboard.
The dashboard is an interactive environment for exploring extracted data products and comparing observations.
See Dashboard GUI guide.
Typical Workflow
Many users interact with GONet Wizard through a workflow similar to:
Inspect images using Show Image.
Review acquisition information using Show Metadata.
Define measurement regions using Extract Region.
Convert RAW files to TIFF/JPEG products with Split RAW Images when portable image outputs are needed.
Analyze extracted products using the dashboard.
Depending on the task, users may skip some of these steps or move directly to a specific tool.
Relationship to the Command Line Interface
Every launcher action corresponds to a command-line command.
GUI |
CLI |
|---|---|
Show Image |
|
Show Metadata |
|
Extract Region |
|
Split RAW Images |
|
Dashboard |
|
The GUI and CLI use the same underlying processing engine and therefore produce identical outputs.
Choosing Between GUI and CLI
The graphical interface is generally the best choice when:
Exploring new datasets.
Inspecting images visually.
Defining extraction regions interactively.
Learning the available functionality.
The command-line interface is often preferable when:
Processing large numbers of files.
Automating workflows.
Integrating GONet Wizard into scripts or pipelines.
Repeating analyses with identical parameters.
Both interfaces are fully supported and may be used interchangeably.